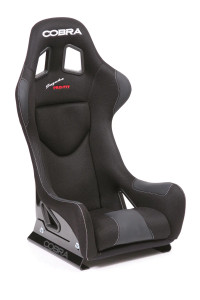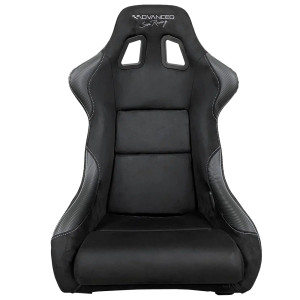
Cobra Monaco Pro Bucket Seat - Black
Advanced Sim-Racing
$679.99
DESCRIPTION
-
An excellent entry-level competition seat, the Monaco features tubular steel frame construction and a deep-sided ergonomic shape for maximum lateral support at a weight comparable to a composite shell. A generous standard width and will accommodate a 5 or 6 point harness system. The Monaco is one our most popular seats for passenger-side applications or where budgets dictate value for money. Side and base mounted for many road or competition applications.
SPECIFICATIONS
- Features:
- Side and base mounted
- All steel tubular construction
- Full 6 point harness facility
- Breathable and cooling Spacer fabric
- Suede-Tec wear patches
- Composite seat shell
- Supplied with high tensile bolts installed
- Weight: 10.3kg
- *Refer to last image for dimensions*
WHAT'S INCLUDED?
- Cobra Monaco Pro Black Bucket Seat
- *Does not include side brackets for mounting*
INSTALLATION GUIDE
- Without Seat Sliders
- Install the 22’ profiles on the chassis. Tighten the bolts holding the corner gussets to the 22’ profile, but leave the bolts attaching the 22’ profile to the chassis loose.
- Install the seat brackets on the 22’ profile. Make sure the inside edge of the seat bracket is flush with the inside edge of the 22’ profile, then tighten the bolts holding the seat brackets on the 22’ profile.
- Install the seat in the brackets, be careful not to scratch the seat while doing this. If necessary, slide the 22’ profile further apart.
- Tighten the seat brackets to the seat in the desired position. Make sure you are using the same mounting holes on each side.
- Make sure the space between the 22’ profiles and the base is equal on each side to center the seat with the chassis. It is okay for the 22’ profiles not to be parallel with each other, as long as the seat is centered and straight.
- Your rig is ready to go!
- With Seat Sliders
- Install the 22’ profiles on the chassis. Tighten the bolts holding the corner gussets to the 22’ profile, but leave the bolts attaching the 22’ profile to the chassis loose.
- Install the seat sliders on the seat brackets. Make sure the inside edge of the seat slider is flush with inside edge of the seat bracket.
- Install the seat slider and seat bracket assembly on the seat while it is off the chassis. Make sure you are using the same mounting holes on each side. Be careful not to scratch the seat while doing this.
- Make sure the two seat sliders are at the same locking position.
- Bend the U handle bar for the seat sliders to make it wider or narrower depending on fitment.
- Install the U handle bar while being careful not to hurt your fingers.
- Install the seat assembly on the 22’ profiles.
- Tighten both front or rear bolts holding the sliders on the 22’ profile.
- Slide seat forwards or backwards to have access to the other bolts. Tighten them.
- Center the seat with the chassis by moving the whole 22’ profile and seat assembly. Be careful not to scratch the profiles.
- Tighten the corner gusset bolts that were left loose at the beginning.
- Your rig is ready to go!


